
Temporary Kitchens: The Essentials for Living Through Your Kitchen Renovation
Real-life tips from a designer who’s lived through it

Kitchen renovations are some of the most exciting transformations you can make in your home, and they’re one of my favorite spaces to design. I fundamentally believe that kitchens should be an extension of your living space, an opportunity to create, gather, unwind, and feel inspired.
Kitchens are also highly detailed projects, involving comprehensive design, clear drawings and documentation, durable and beautiful material selections, and thoughtful construction coordination. Working with a seasoned interior designer helps bring all of those moving parts together, ensuring the design is fully thought through and ready to be implemented. That way, when construction begins, the process can move forward as quickly and efficiently as possible because the plans are already in place.
Now, getting down to the meat of today’s post! If you’re planning to live in your home during construction, keep reading. Outside of stellar design plans (hopefully provided by yours truly 😉), one of the most essential tools for a smooth renovation is a temporary kitchen.
As your construction start date approaches you’ll want to be prepared, because things are about to get a little unglamorous. There will be dust and disarray, there will be zip walls, and there may even be the occasional breakdown 😅. But it will be 100% worth it in the end, and setting yourself up for success during your renovation will help keep your daily routines on track.
Having lived through a kitchen renovation myself, I know firsthand how important that setup can be.
So without further ado, here’s your survival guide to the temporary kitchen…
What Is a Temporary Kitchen?
A temporary kitchen is a small, functional setup in another part of your home that allows you to prepare simple meals, store food, and handle basic cleanup while your main kitchen is out of commission. It doesn’t need to be fancy. The goal is to still be able to eat at home, make your morning coffee, and keep daily life moving without too much disruption.
Planning Tip 1: Choose Your Temporary Kitchen Location
Start by identifying a spot in your home that you can temporarily clear out and dedicate to your kitchen setup. Ideally, this space should be near a bathroom or another sink source.
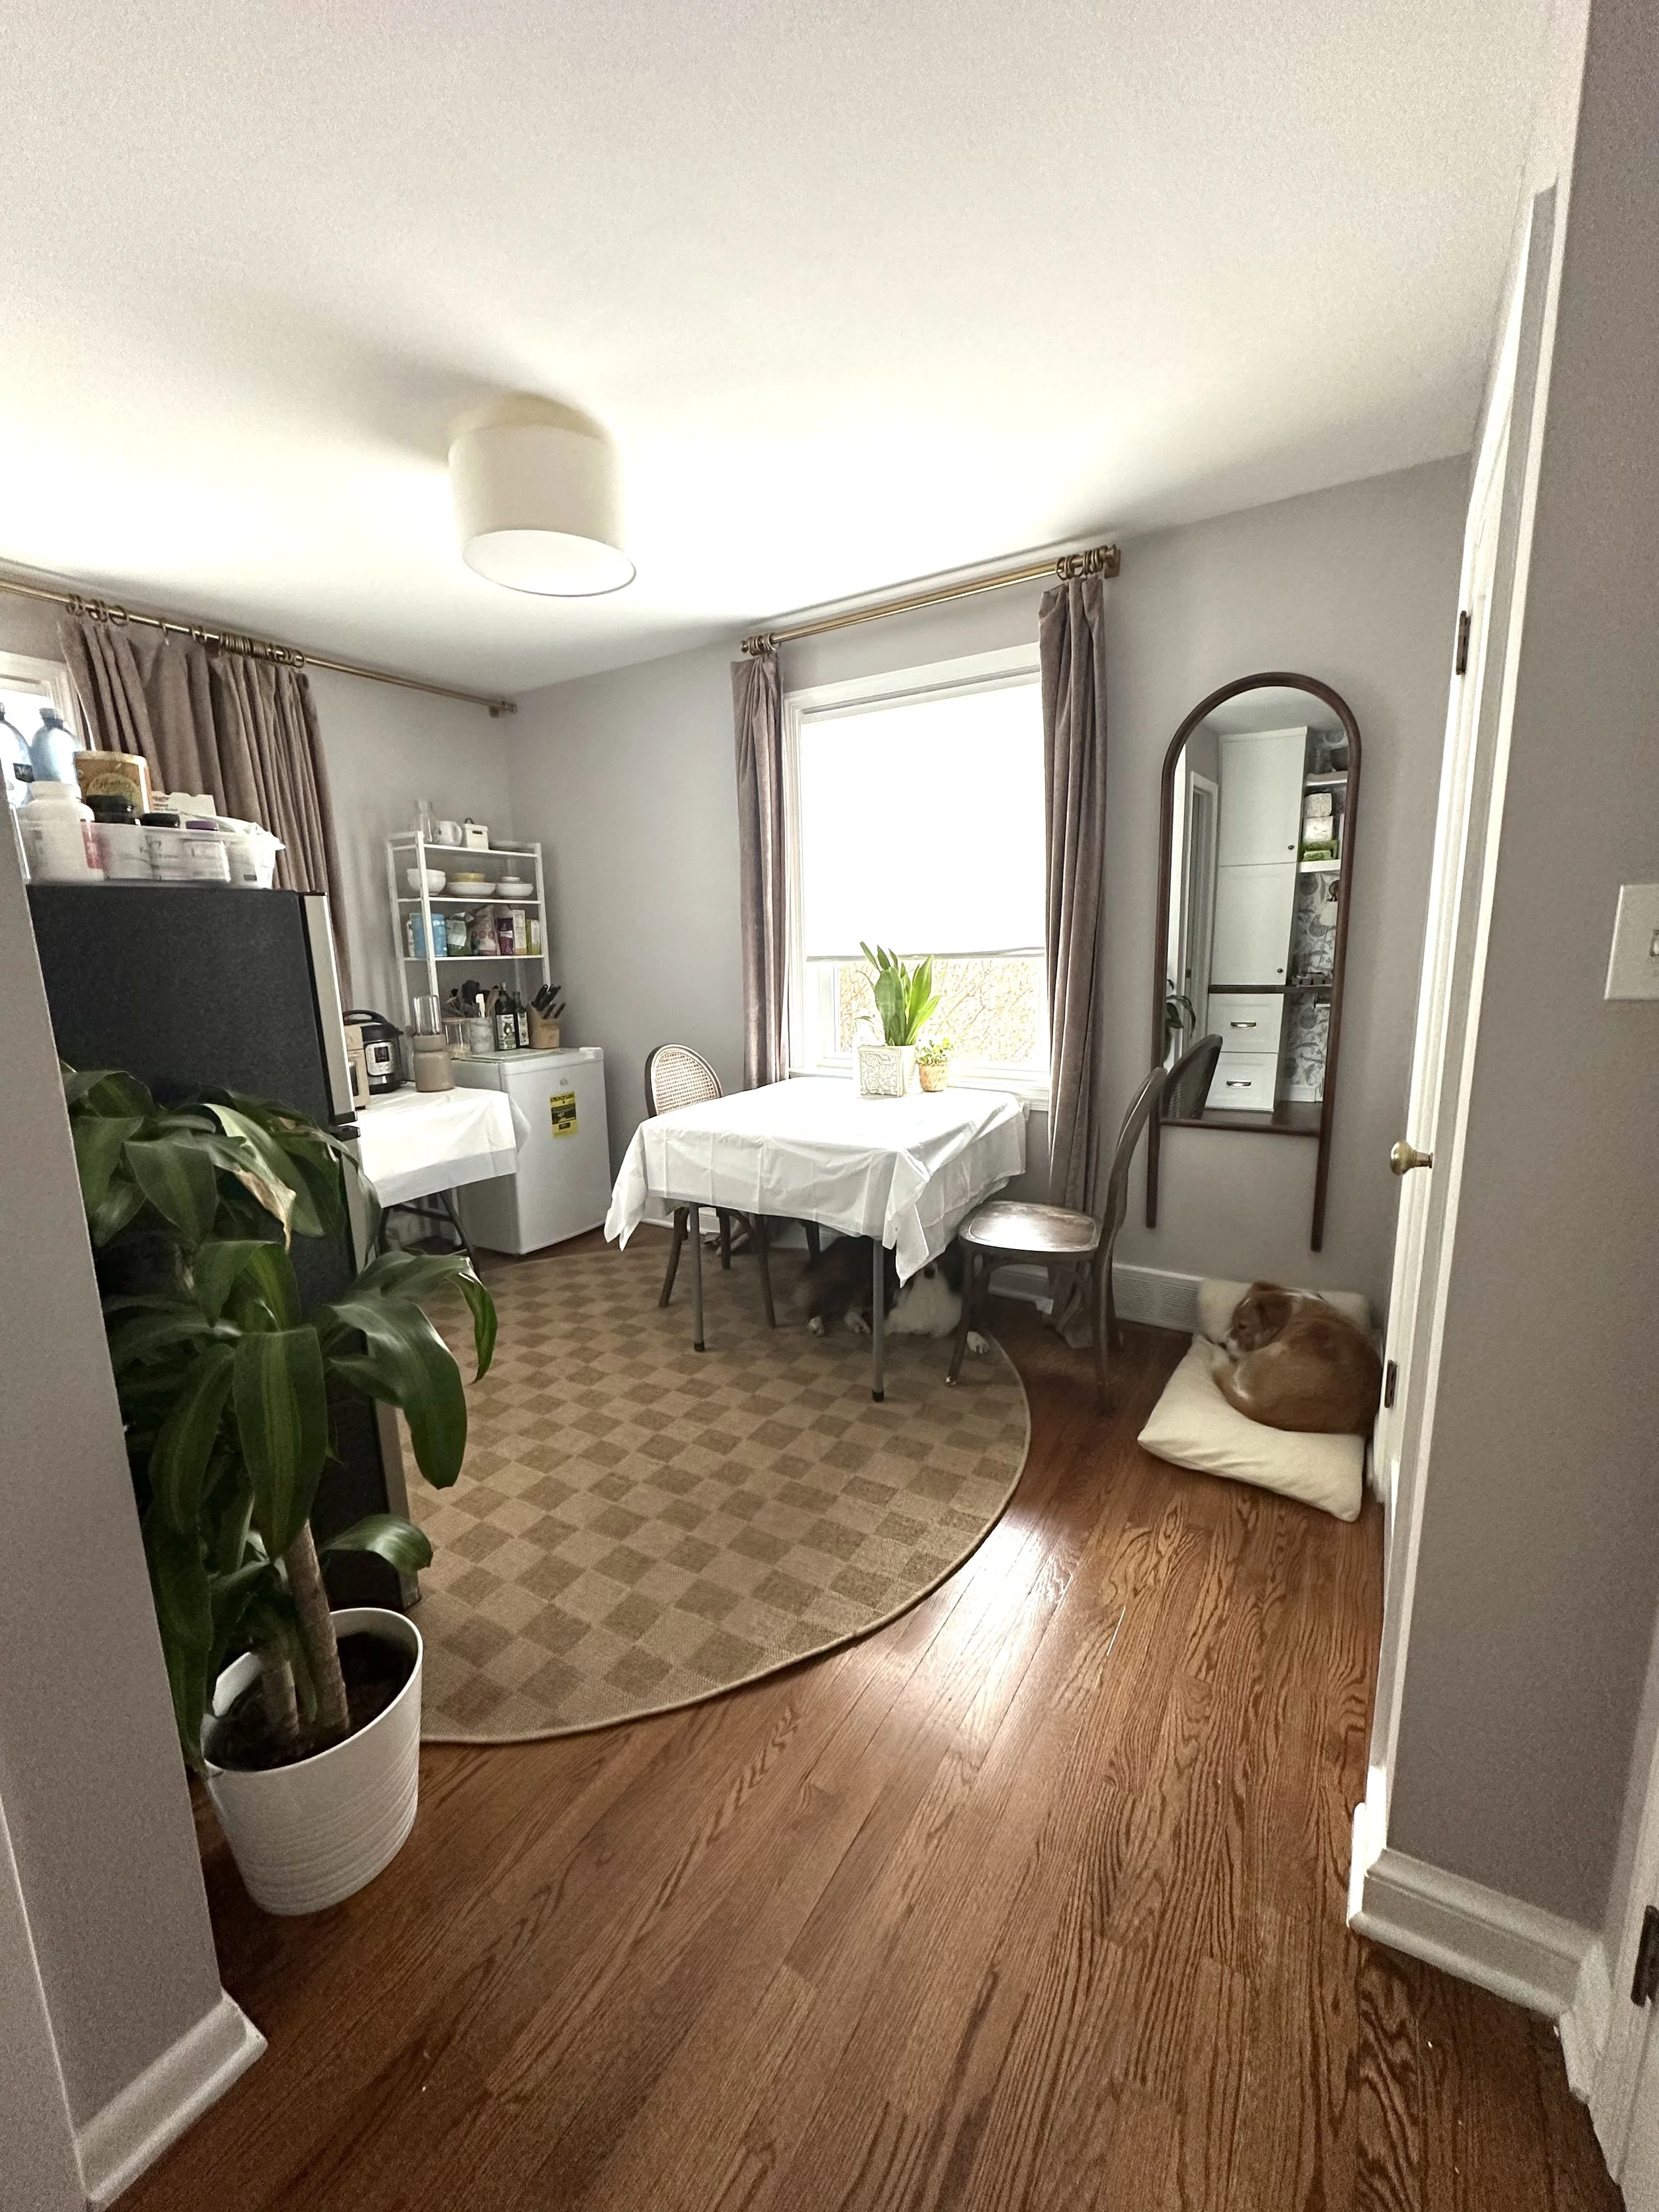
We chose our first-floor guest room, which has a small bathroom attached. Having access to running water was an absolute game changer, and it was easy enough to pack the bed and nightstands away in the garage for the reno.
Planning Tip 2: Freeze Meals in Advance
One of the best things we did before construction started was prepare and freeze meals ahead of time. Having ready-made options in the freezer made weeknights so much easier. On days when I didn’t feel like dealing with a hot plate or toaster oven, I could just heat something up and still enjoy a home-cooked meal.
And when you start running low, consider borrowing a friend’s or family member’s kitchen for an afternoon to cook and restock your freezer. A little batch-cooking session can carry you through another stretch of the reno.
If you can, I highly recommend setting up a separate freezer for this. Even if you can’t fit it in the temporary kitchen, placing one in the basement or garage can make a big difference.
Planning Tip 3: Choose the Right-Sized Fridge and Freezer
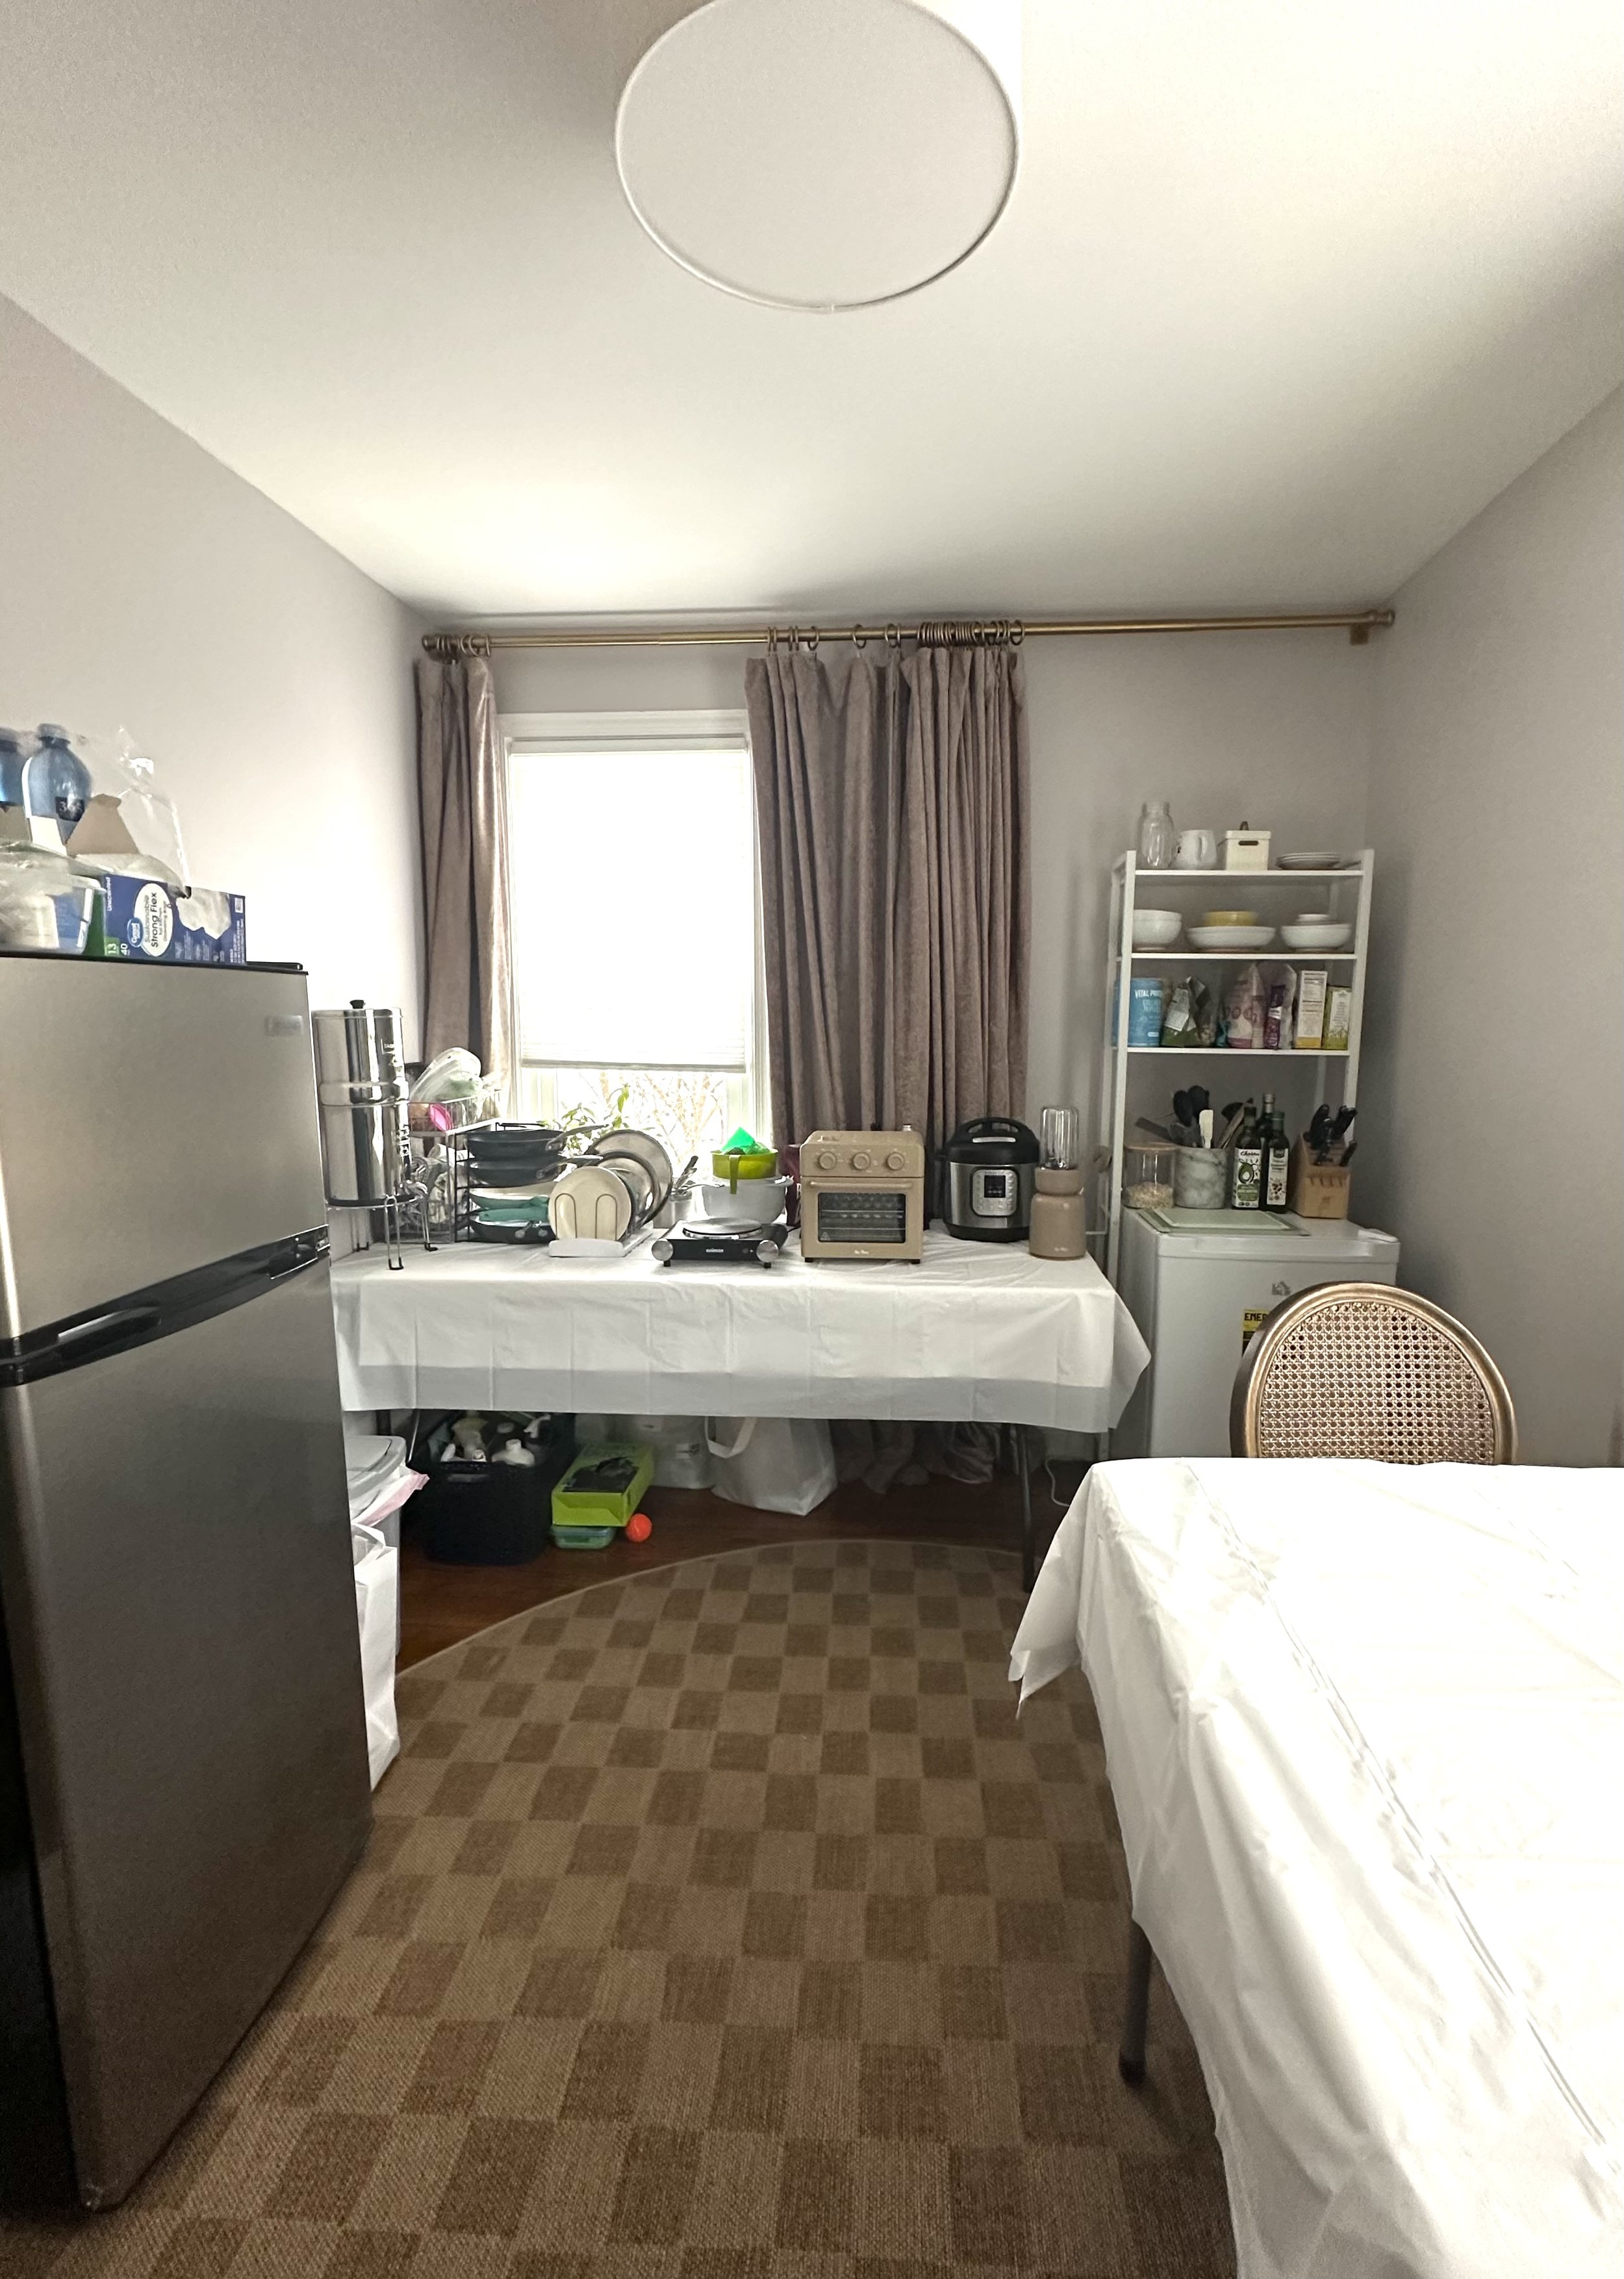
During our renovation, we used an apartment-sized fridge and freezer combo, along with a separate small standing freezer to hold all of those prepared meals. Both fit easily through the doorway of our guest room and provided plenty of storage for this downsized setup.
I purchased them online from Walmart and resold them on Facebook Marketplace after construction was complete. They were well worth the minimal investment.
Planning Tip 4: Use Cooking Tools That Actually Work
You don’t need a full kitchen, but you do need a few reliable tools.
Our temporary setup included:
A toaster oven/air fryer combo
Hot plate (this was great for quick eggs in the morning)
Microwave
Smoothie blender
Instant Pot
Tea kettle
Water filter (like a Brita)
If you only invest in one multi-use appliance, I’d recommend a toaster oven. It gives you much more variety than a microwave alone. You can reheat leftovers, roast vegetables, toast bread, and even cook small meals.
The goal is to have just enough equipment to make simple, satisfying food without cluttering your temporary space.

Planning Tip 5: Plan for Water and Dish Management
One of the biggest adjustments during a kitchen renovation is figuring out where to wash dishes.
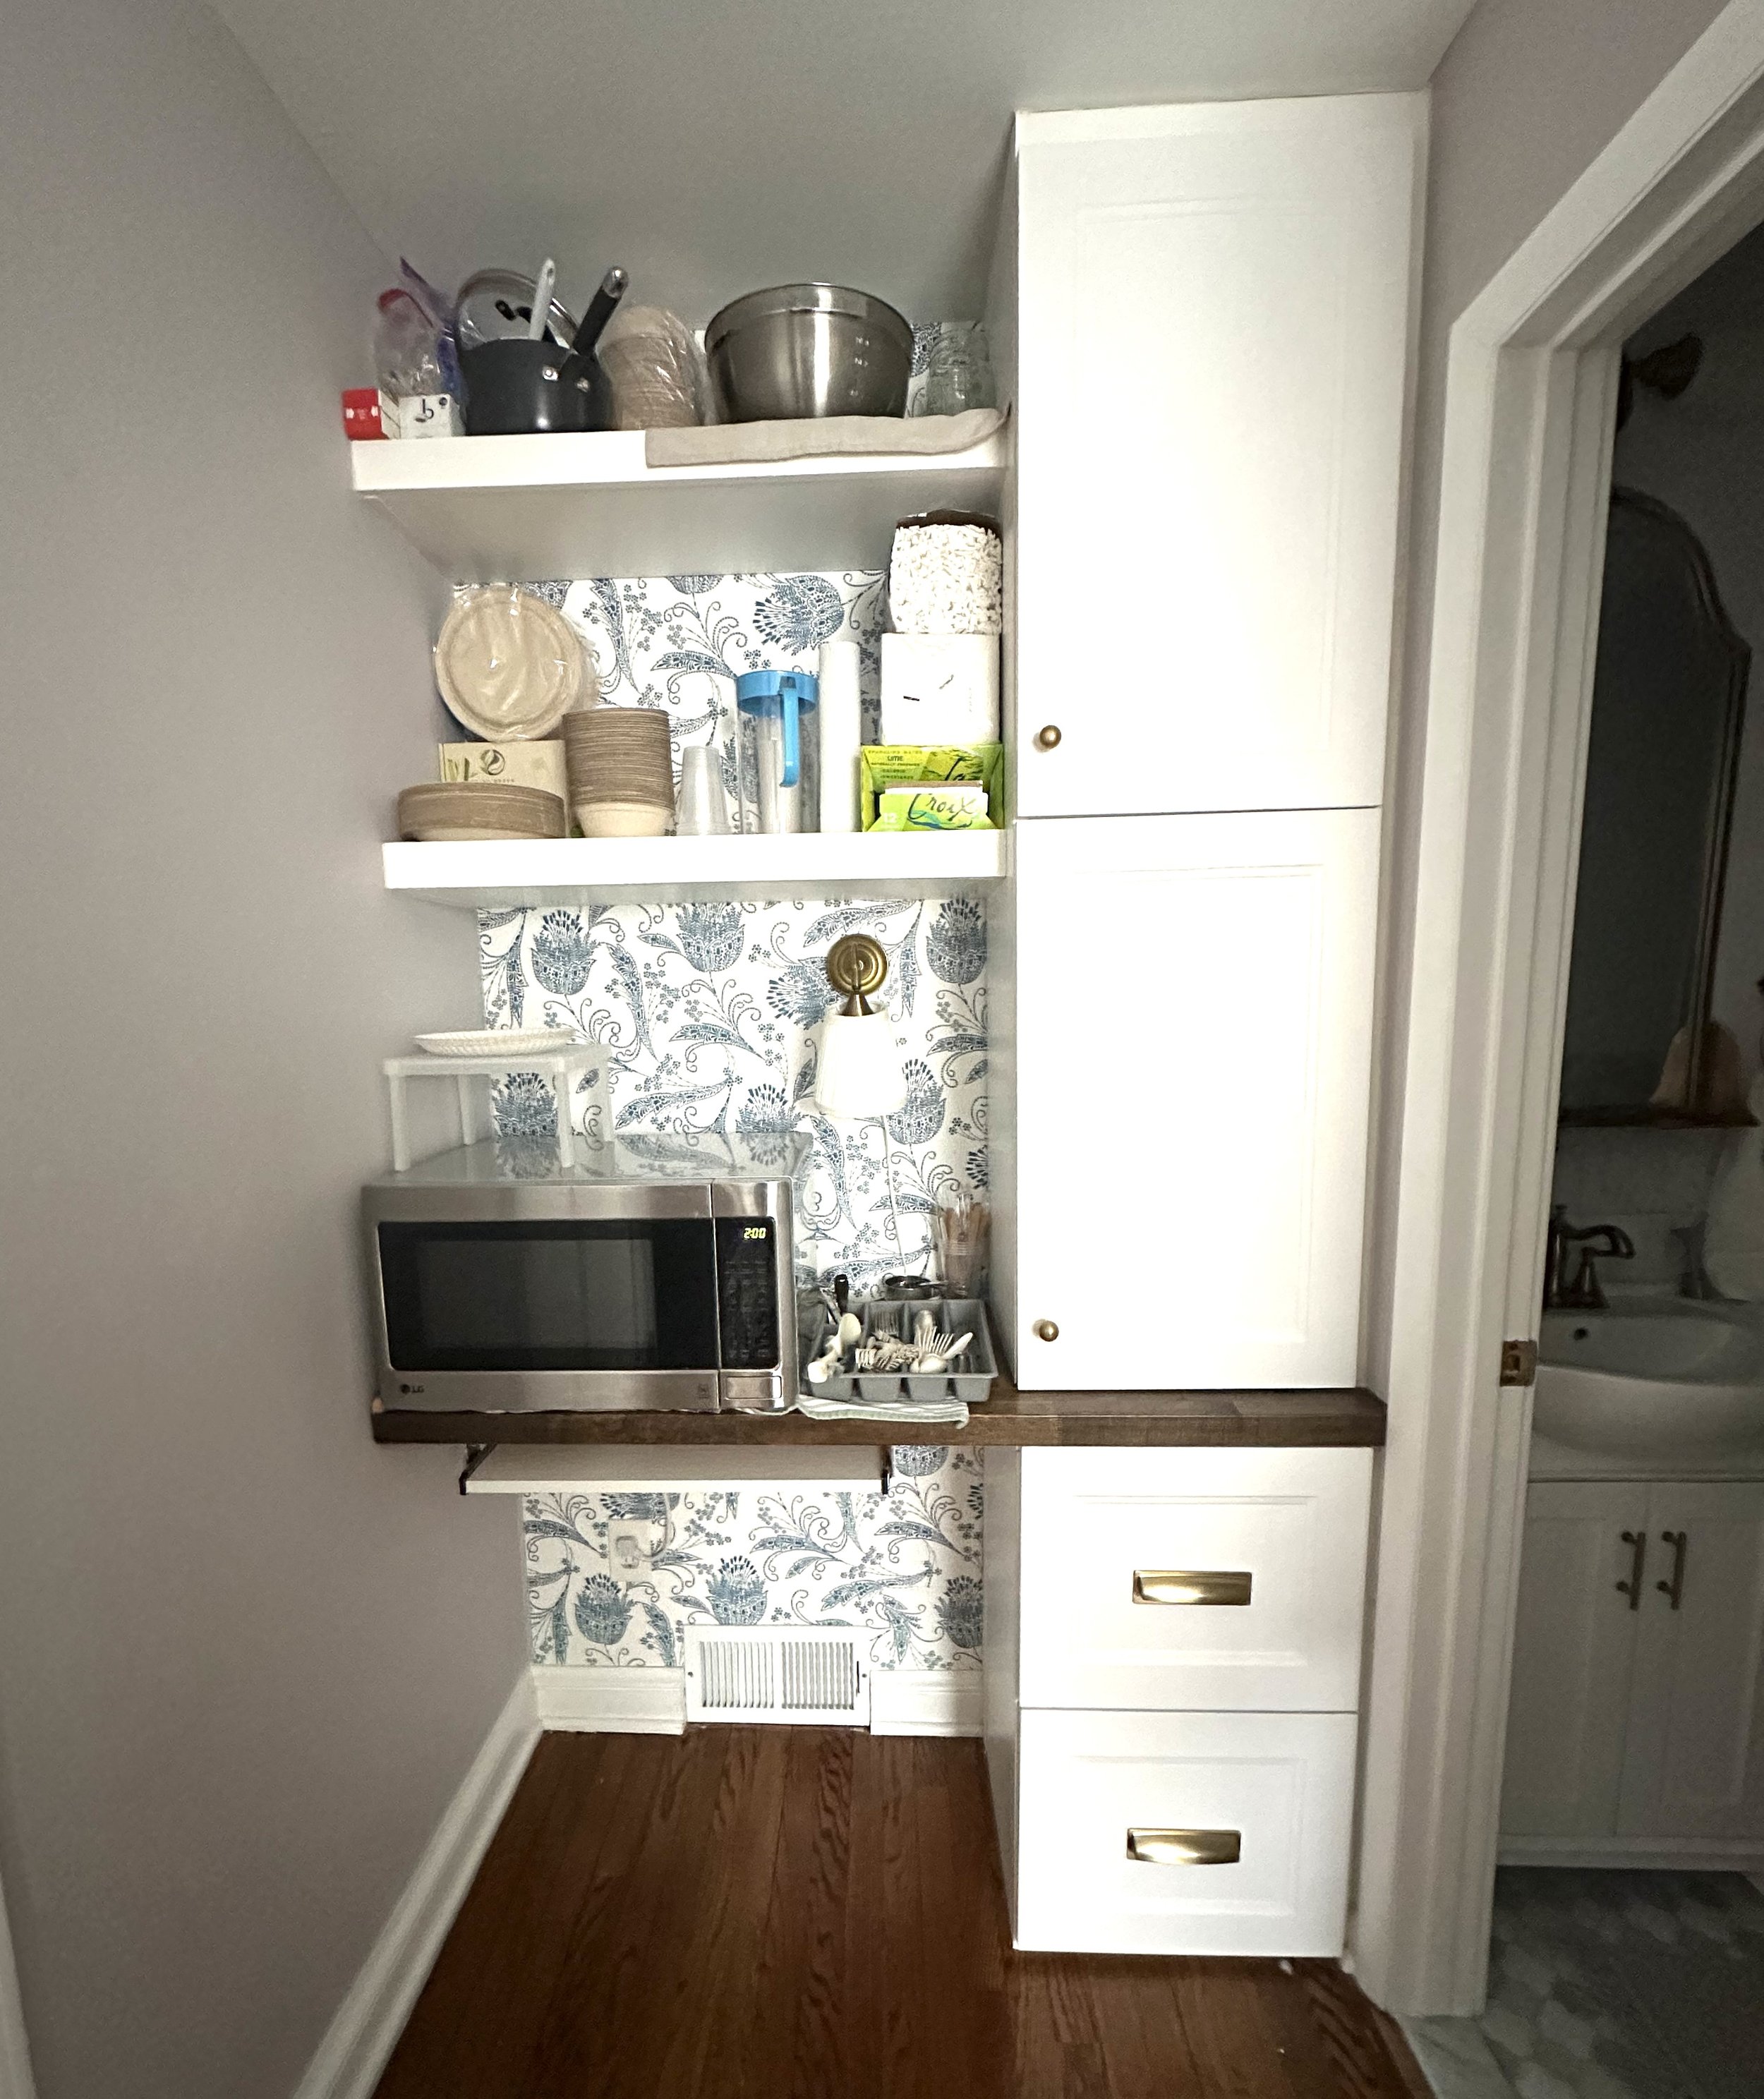
In our case, we used the small bathroom sink for basic cleanup. It wasn’t ideal, but it worked just fine for rinsing cups, utensils, and a few small items.
To keep things simple, we relied heavily on disposable, eco-friendly plates and bowls. It reduced the amount of washing we had to do and made daily life much easier. I didn’t love the waste, but they were at least biodegradable.
It’s also important to remember that even if your temporary kitchen is in another room with the door closed, construction dust has a way of traveling. Keeping items like plates, cups, and cutlery sealed or bagged helps prevent that layer of dust from settling.
Planning Tip 6: Dust-Proof the Essentials
As mentioned above, if there’s one thing I learned the hard way, it’s that dust finds its way everywhere.
Even with doors closed and plastic barriers up, fine construction dust can travel through the house. Just assume that if you’re renovating your kitchen, other areas on the first floor will likely experience an increase in dust.
Planning Tip 7: Consider a Delivery Service Membership
There will be nights when cooking just isn’t appealing, no matter how well your temporary kitchen is set up.
For us, a DoorDash annual membership ended up being a great investment. It eliminated many of the delivery fees, and we definitely got our money’s worth during the renovation.
Whether it’s DoorDash or another local service, it can be helpful to plan for a few easy takeout nights each week. It takes some of the pressure off and gives you a break when you need it.
Planning Tip 8: Plan a Spot for Respite
In addition to your temporary kitchen, it’s important to think about where you’ll go to relax and reset during construction.
In our setup, we added a small card table so we’d have a place to sit and eat together. In the middle of all the dust and disruption, coming together for a simple meal at that little table felt like a luxury.
We were also renovating our main living area at the same time, so we didn’t have our usual sofa or TV space. Fortunately, we have a small living area in our basement with a TV and a couple of sofas. It quickly became our go-to spot to unwind at the end of the day.
Whether it’s a bonus room, a finished basement, or even a bedroom where you temporarily move a TV, having a designated space to relax will be essential during your renovation. It helps restore a sense of normalcy while other areas in the house feel a bit displaced.

You Can Survive With the Right Plan!
Living through a kitchen renovation isn’t always easy, but a thoughtfully planned temporary kitchen can make it far more manageable.
With a few key appliances, some freezer meals, access to a water source, and a bit of dust-proofing, you can keep your daily routines intact and your stress levels in check while your new kitchen takes shape behind the scenes.
If you’re considering a kitchen renovation, visit my Inquire page to get started. I’d love to help you design a beautiful kitchen that supports the way you want to live.
With the right plan in place, even the in-between phase can feel manageable, and in the end, your dream kitchen will be worth the wait!
See the full kitchen and first floor reveal here!